Octopus Deploy HA Cluster
Similarly to Polling Tentacles, the Kubernetes agent polls Octopus Server for work, so in an HA Cluster it must be able to receive commands from every node. There are two ways to do this:
- Turn on multi-node support for Polling Tentacles. The agent only needs a single URL, such as a load balancer in front of the nodes. See Multi-node support for Polling Tentacles.
- Give the agent a URL for each individual node in the HA Cluster. These URLs must be provided when registering the agent or some deployments may fail depending on which node the tasks are executing.
To read more about selecting the right URL for your nodes, see Polling Tentacles and Kubernetes agents with HA.
Multi-node support for Polling Tentacles
When multi-node support for Polling Tentacles is turned on, the nodes share pending requests through Redis, so the agent can collect work queued by any node from whichever node it connects to. The agent only needs a single Communications URL.
The Kubernetes agent creation wizard detects that the feature is on, and does not show the extra page that asks for a URL for each node. Instead, it uses a single Octopus Deploy Server Communications URL. By default, this is your Octopus Server URL with port 10943. To use your Polling Tentacle load balancer instead, select Advanced Setup in the wizard and enter its address, for example https.
Because the agent connects through a single URL, you do not need to update it when you add or remove nodes.
If you turn off multi-node support for Polling Tentacles, configure every agent with a URL for each node first. Otherwise, tasks run by a node the agent is not connected to wait for the agent until they time out.
Agent Installation on an HA Cluster
This section is for HA Clusters that do not use multi-node support for Polling Tentacles.
Octopus Deploy 2024.3+
To make things easier, Octopus will detect when it’s running HA and show an extra configuration page in the Kubernetes agent creation wizard which asks you to give a unique URL for each cluster node.
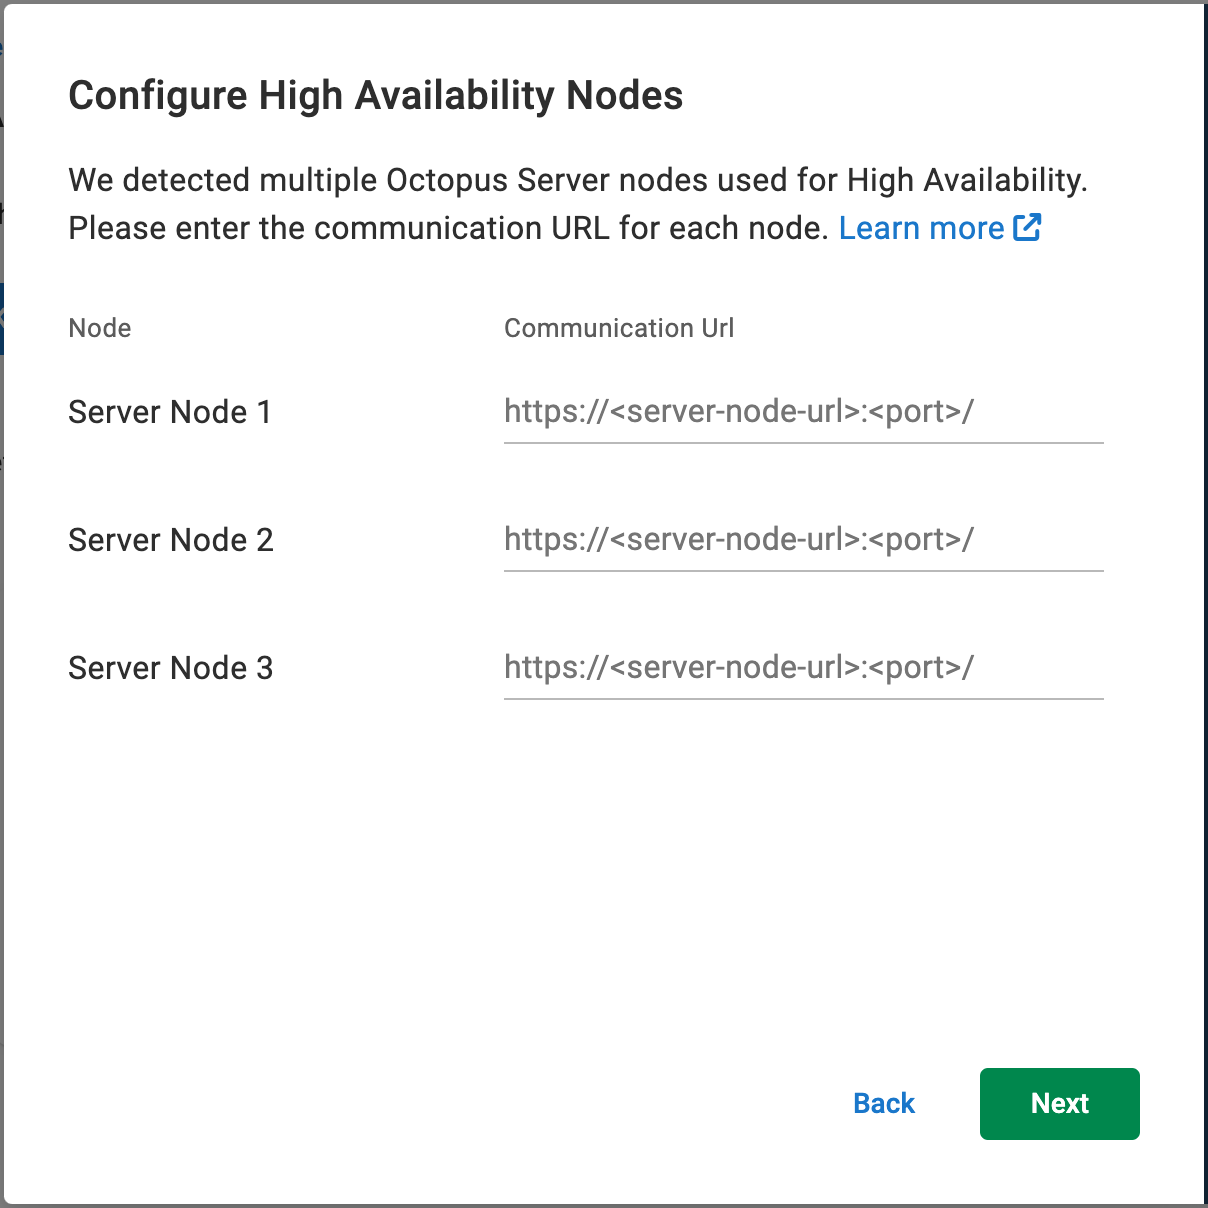
Once these values are provided the generated helm upgrade command will configure your new agent to receive commands from all nodes.
Octopus Deploy 2024.2
To install the agent with Octopus Deploy 2024.2 you need to adjust the Helm command produced by the wizard before running it.
- Use the wizard to produce the Helm command to install the agent.
- You may need to provide a ServerCommsAddress: you can just provide any valid URL to progress the wizard.
- Replace the
--set agentproperty with.serverCommsAddress=" . . ."
--set agent.serverCommsAddresses="{https://<url1>:<port1>/,https://<url2>:<port2>/,https://<url3>:<port3>/}"where each <url> is a unique address for an individual node.
- Execute the Helm command in a terminal connected to the target cluster.
The new property name is agent. Note that “Addresses” is plural.
Upgrading the Agent after Adding/Removing Cluster nodes
If you are not using multi-node support for Polling Tentacles and you add or remove cluster nodes, you need to update your agent’s configuration so that it continues to connect to all nodes in the cluster. To do this, you can simply run a helm upgrade command with the urls of all current cluster nodes. The agent will take remove any old urls and replace them with the provided ones.
helm upgrade --atomic \
--reuse-values \
--set agent.serverCommsAddresses="{https://<node-one-url>:<node-one-port>/,https://<node-two-url>:<node-two-port>/,https://<node-three-url>:<node-three-port>/}" \
--namespace <agent-namespace> \
<agent-release-name> \
oci://registry-1.docker.io/octopusdeploy/kubernetes-agentKubernetes Monitor
Support for running the Kubernetes monitor with high availability Octopus clusters was added in v2025.4
The Kubernetes monitor is able to avoid configuration for each individual Octopus server node. Instead, simply set up a single load balancer endpoint for gRPC and use that url.
Refer to the load balancer documentation for further information.